Saturday, July 21, 2012

Baby Bella Panini

This recipe is one of my family’s absolute favorites. Baby Bella Paninis have become a staple in our house. The original inspiration for this recipe came from a recipe by “La Vegetariana” who’s real name is Monica. She's known as the Italian vegetarian and has her own website: www.LaVegetariana.com. Her original recipe for this sandwich was called ‘Bello Sangweech. Because I modified the recipe so much I changed the name to Baby Bella Panini; but all the credit for creativity behind this sandwich belongs to Monica.

To make Baby Bella Paninis.....

You will need: (Makes 5 Paninis)

Filling
1 small onion
Coconut Oil
1-2 tbsp minced garlic
1-2 cup fresh spinach (chopped)
1-2 teaspoons herbamare
1 pkg baby Bella mushroom (chopped)
4 tbsp bread crumbs
¼ cup organic vegetable broth

Spread
1 cup vegan mayo ( I use soy-free vegenaise)
1 tbsp organic ketchup
1 tsp minced garlic
1 tbsp lime juice
¼ cup chopped fresh parsley

Panini Assembly
Bread
Fresh Sliced Whole Milk Mozzarella Cheese (for non-vegans)
Daiya Wedges (I like Jack Style) for vegans
Soy-free Earth Balance

To Make:

1. Start by making the spread so you can refrigerate it while you prepare the rest of the Panini. In small bowl mix together all ingredients listed for spread; cover and refrigerate.

2. Next prepare the sandwich mix. In large pan sauté onions and garlic in coconut oil until onions are caramelized. Then add vegetable broth, bread crumbs, spinach, and mushrooms, and herbamare. Sauté until mushrooms and spinach are cooked then remove from heat.

3. Then begin to assemble paninis for cooking. Heat griddle or Panini maker. Take 10 bread slices and on one side of each slice spread soy-free earth balance. Take five of those slices and place them spread side down on the hot griddle. If using cheese or vegan cheese alternative; place cheese slice on top of bread.

4. Next take 1/5 of the spinach/mushroom mixture and spread it on top of the cheese on each of the 5 slices. Then take remaining slices of bread and spread some of the mayo spread you prepared onto the non-buttered side of each remaining bread slice. And place bread slices on top of the spinach/mushroom mixture (mayo spread on the inside). Press down using spatula; then flip and continue to cook until both sides of bread are golden brown.

5. Plate and serve with your favorite salad or veggie chips.

My family gives this recipe 5 out of 5 stars especially when I serve it with their favorite homemade kohlrabi chips.


 All my ingredients gathered and ready.
 Adding mushrooms to carmelized onions and garlic.
 Adding in remaining filler ingredients.
 Spread all made.
 All assembled
 Just about done.
Plated and ready to eat.
On this night I served it with a vegan broccoli salad using garden fresh broccoli.

Summer Veggie Quesadillas


Well I am "rest” bound today because of a very swollen arthritic knee so I thought it a perfect time to do a recipe share or two.

The first recipe I want to share with you came from the need to utilize the abundance of organic summer veggies we are enjoying from our crop share. I am calling it “Summer Veggie Quesadillas” for lack of a better name.  I prepared this vegan for myself and vegetarian for the rest of my family.

Here is what you will need:

Summer Veggie Quesadillas

1 cup chopped red pepper (chopped)

1 cup chopped zucchini (chopped)

1 cup chopped summer squash (chopped)

1/2 cup sweet vidalia onion (chopped)

1/2 cup mushrooms (sliced)

1/2 cup tomatoes (chopped)

1 15oz can organic black beans (rinsed and drained)

Coconut oil (I use Nutiva Organic Coconut Oil)

Taco seasoning (I made my own with a recipe by Rachel Ray)

Tortillas (I use Joseph's Middle East Bakery Flax, Oat Bran & Whole Wheat Tortillas)

Cheese of Choice (For myself I used Daiya Pepperjack Style Shreds (vegan), and for my family used Organic Valley Shredded Mexican Blend)

Here's how to make them:

1. If you want to make your own taco seasoning that is simple and has some zip to it here’s the recipe by Rachel Ray that I used: http://www.rachelcooks.com/2011/10/28/homemade-taco-seasoning/
 
2. Next sauté all your veggies and beans with a little coconut oil and a dash of homemade taco seasoning. Cook until veggies are tender. Then remove from heat and season with more taco seasoning depending on how spicy you want your quesadillas.
 
3. Then over medium heat in pan spritzed with coconut oil place tortilla in pan; add a layer of cheese, then scoop of veggies, then a little more cheese. Cook till both sides of tortilla are browned.
 
4. Finally slice into quarters and serve. I plated mine with a little salsa; and for my family as you can see below I plated theirs with salsa and sour cream.

My family gave this recipe 5 out of 5 stars and so did my niece who was staying with us for the weekend.

 veggies all ready to be sauteed
 cheese and veggie layers added
 all sliced up and ready for plating
 Vegetarian one all plated with sour cream and salsa
Homemade Taco Seasoning

Thursday, July 12, 2012

Yesterday’s Venture Part 2.…Creamy Sweet Potato Bake!

Well girls are still asleep, dogs fed, and laundry started…..guess I will sit here and enjoy my smoothie and give you part two of yesterday’s venture.

This is a recipe I have made a few times. It is one of my favorites to eat the night before a race because it is a healthy, carb-loaded power meal. So with my 5k race today; this was my meal of choice for last night.

This recipe is from veganyumyum.com by Lauren Ulm. Lauren is the author of the cookbook Vegan Yum Yum: Decadent (But Doable) Animal-Free Recipes for Entertaining and Everyday. She is a fabulous vegan cook and many of the recipes I love to prepare from my family have come from; or have been inspired by her cooking techniques.

So here's the recipe:

Vegan Creamy Sweet Potato Bake

What you will need:
3 cups Einkorn Pasta - Whole Grain Fusilli
3 cups kale, raw (chopped)
1 1/2 lb Sweet Potato, Raw (Peeled and diced into chunks)
1 1/4 cups Organic Unsweetened Almond Milk
1/3 cup Organic Raw Cashews
1/3 cup Nutritional Yeast Flakes
2 tbsp Soy Free Earth Balance
1 tbsp Bragg’s Liquid Aminos ( I used 2-3 tbsp)
1/2 tsp Mustard Powder
1/4 tsp Ginger Powder
1/4 tsp Nutmeg, Ground
3/4 tsp Thyme, Dried
1/2 tbsp Paprika

Directions

Bring a large pot of water to a boil and cook pasta until almost done. Just before the pasta is finished, toss the chop kale into the water. When kale is bright green and pasta is ready, drain and set aside.

While pasta is cooking; peel and cube sweet potatoes and cook in salted water until tender but not falling apart. Then drain and set aside.

Next reheat oven to 400F.

Combine all remaining ingredients into a food processor and blend until smooth and creamy. Taste. Add a little salt and pepper if necessary.

Finally combine pasta, kale, potatoes and sauce in a casserole dish. Bake uncovered for 20 minutes or until hot and bubbly.
 

All my ingredients gathered and ready! 

Everything all cooked and ready to be combined.

 I decided to serve mine with sauteed fresh organic zucchini and summer squash since I had some fresh from our co-op.


All done and fresh from the oven!
All plated and ready to eat!

Yesterday’s Venture Part 1.….Vegan 3 Layer Dip With Cannellini, Roasted Red Peppers & Pesto!

Well since I am opting to not run this morning because I have a race tonight; thought it would be a good time to get another blog update done. So join me for a couple of minutes as I sit here with my tea in hand enjoying a breath taking sunrise on my deck; to share with you another little piece of my vegan venture.

This morning I want to share with you a couple of recipes I utilized yesterday. I am going to put these in two separate blog entries to make it easy for people to search and refrerence the recipes. The first recipe I prepared was brand new to me and came from the Made Just Right website by Earth Balance. I decided since it was my hubby’s day off I would make this for lunch along with some pita pocket sandwiches. Its was a huge hit with all of my family member’s except by oldest daughter, Rebecca. Becca does not like bean dips so really wasn’t even a fan of trying it. But my husband and other two daughters devoured it and gave it a 5 out 5; which is the little rating scale we use when I am using them as guinea pigs for a new vegan recipe. Five means; “This is fabulous, when are you making it again!.” Where one means, “Please throw this recipe away and never make us eat it again.”

Here’s the recipe and the changes I made are in parenthesis.

Vegan 3 Layer Dip With Cannellini, Roasted Red Peppers & Pesto

Ingredients:


For Rosemary White Bean Dip

2 15 oz. cans cannellini beans, drained and rinsed (or 3 1/2 cups cooked cannellini beans) (I used canned organic)
1/3 cup Earth Balance Olive Oil Mindful Mayo (I used Soy Free Vegenaise instead because that is what I had on hand. But I looked into this mayo and it is also soy-free as well so I think I might give it a try.)
3 Tbs. chopped fresh rosemary leaves (3 stems fresh rosemary)
2 cloves minced garlic (about 1 Tbs.)
2 Tbs. fresh lemon juice (from 1 lemon)
salt and black pepper, to taste ( I used herbamare instead of salt and pepper)

For Creamy Basil Pesto

2 cups packed fresh basil leaves, plus a few extra leaves for garnish
1/3 cup pine nuts
2 to 3 garlic cloves, peeled (We love garlic so I actually used 2 tbsp minced garlic)
1/2 cup extra virgin olive oil
1/3 cup nutritional yeast flakes
2 Tbs. fresh lemon juice (from one lemon)
salt and black pepper, to taste ( I used herbamare instead of salt and pepper)
1/3 cup Earth Balance Olive Oil MindfulMayo® Dressing & Sandwich Spread (Again I used Soy Free Vegenaise)

For Roasted Red Peppers

3 roasted red peppers, stemmed, peeled, seeded and finely chopped ( I only used one Organic Sweet Red Pepper because that is all I had on hand fresh from the farm; but I will definitely use 3 if not 4 next time. The peppers give it that sweet spicy pop; as well as adding great texture.)

Directions:

The first step in making this delicious dip is roasting the peppers.
1. Start by washing and drying your peppers.
2. Preheat your oven to 425°F.
2. Place whole peppers in a 9" x 13" glass baking dish.
3. Drizzle with oil, turning the peppers to coat evenly. (about 2 Tbsp oil). (I use coconut oil by Nutiva)
4. Roast peppers 15 minutes, turn the peppers over, and roast 5 to 8 minutes longer, until the skins are charred.
5. Remove from oven and cover with a kitchen towel until the peppers are cool enough to handle.
6. Once peppers are cooled; removed skin, seeds, and stems and dice pepper into pieces.

While your peppers are cooling you can make the bean portion of the dip. To do this First place the first five ingredients for the Rosemary White Bean Dip in a blender or food processor. Pulse until smooth. If the mixture is too thick, add a small amount of warm water. Adjust seasonings to taste and add salt and pepper (I used herbamare). When done scoop into serving bowl. (Be sure and use a bowl big enough to add the other two layers) Refrigerate until ready to use.

Next to make the Creamy Basil Pesto, pulse basil, pine nuts and garlic in a blender or food processor until finely chopped. Slowly add olive oil while the blender is running. Scrape down the sides and add nutritional yeast and lemon juice. Pulse to mix well. Season with salt and pepper (again I used herbamare). Mix with vegan mayo and be sure all ingredients get well combined. Then refrigerate until ready to use.

Lastly, to assemble the Three Layer Dip, remove your decorative glass bowl with the Rosemary White Bean Dip from the refrigerator and top with Roasted Red Peppers. Carefully spread the Creamy Basil Pesto over the top of the peppers. Then garnish with chopped basil leaves and serve with toasted baguette slices, fresh cut vegetables and whole grain crackers. (I used an assortment of fresh veggies we just got from our co-op.)

This is a great dip to serve at BBQ’s, dinner parties; or for just enjoying a healthy lunch with your family. Give it a try and let me know what you think!


 The beautiful sunrise I was enjoying while writing this entry.

 Bean dip all done.

 Next layered with freshly roasted peppers.

The topped with creamy pesto and plated with veggies (I used carrots, tomato slices, cucumbers, raw white beets slices, and pea pods) for dipping.


 Obviously this was a hit with my family! This bowl looked this way after only about 15 minutes :)

Wednesday, July 11, 2012

Smoothies to start our day off right!

As I mentioned in a previous post I enjoy the health benefits of smoothies everyday; but I also wanted to highlight how I add smoothies to give my whole family a nutritional boost. This morning with a busy day ahead I decided to make a variety of healthy smoothies to cater to the different likes and dislikes of each of my family members. Smoothies are a great, kid-friendly way to get those essential vitamins in minerals in your kids.
Though I am pretty lucky to have kids who will happily eat a wide variety of healthy, nutritious foods; smoothies are still a great way to give them an extra power boost. I especially do this for my two older girls have been taking part in some intense physical training to get ready for their fall sports of field hockey and soccer.

Here are the recipes I used today. These are little creations I came up with to cater to my family’s likes and dislikes.

My smoothie today is a Tart Cherry Smoothie. I utilize this smoothie when I am increasing my fitness training; and especially when I am getting ready for a race.

Tart Cherry Smoothie

1 cup Organic Tart Cherry Juice
1 Cup Organic Frozen Blueberries
1 cup Organic Coconut Water
4 tbsp Organic Ground Flaxseed Meal
1 Organic Banana

This smoothie recipe yields about 24-26 ounces. I drink half mid-morning and half mid-afternoon.

Next up was the smoothie I made for my hubby and youngest daughter. I have nicknamed this one blueberry bliss.

Blueberry Bliss Smoothie

2 cups Organic Frozen Blueberries
1 cup Organic Frozen Pineapple Chunks
1 Organic Banana
1 cup Organic Coconut Water
6 tbsp Organic Ground Flaxseed Meal

This recipe yielded two 14 ounce glasses.

Then it was time for Miss Sammie’s smoothie. I call this one blueberries and cream.

Blueberries and Cream Smoothie

1 cup Organic Frozen blueberries
¼ cup Organic Pineapple Chunks
3 tbsp Organic Ground Flaxseed Meal
½ cup Organic Coconut Water
½ cup Organic Vanilla Almond Milk
½ of an Organic Banana

This recipe yields about 16 ounces.

The last smoothie I made this morning was for my oldest daughter Rebecca; who is a vegetarian. With Becca I am extra careful to be sure she takes in a healthy amount of vegetarian proteins in her daily nutrition. It is easy for vegetarians and vegans to lack this in their diets. Though I am not protein obsessed; and do not share the belief that protein is life’s most critical nutritional component; I do however feel it is an essential to include a healthy amount of protein in our daily nutrition.

So here’s what I made for Miss Becca this morning. This one is called pineapple passion because one of Becca’s favorite foods is pineapple.

Pineapple Passion Smoothie

1 cup Organic Frozen Pineapple Chunks
1/2 cup Organic Coconut Water (mango flavored)
1 cup Organic Vanilla Almond Milk
3 tbsp Organic Ground Flaxseed Meal
1 tbsp Organic Hemp Protein Powder (Just enough to give her over 10 grams of protein; but not turn her smoothie green. Because Miss Becca is not a fan of “Green” smoothies.)

This recipe yielded a full 16 ounce glass.

Well that sums up our morning here in the Boutwell household; guess you could say we are off to a “smooth start” this morning. Sorry couldn’t resist the corny pun. Have a blessed day everyone!


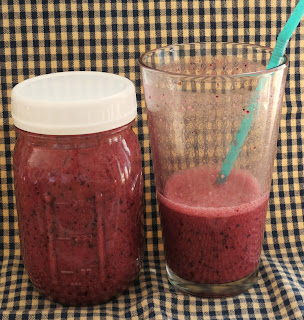
This is the Tart Cherry Smoothie. Sorry almost forgot to take the pic; thus why the glass is half gobbled up already.

 This is the Blueberry Bliss Smoothie I made for Scott & Meggie.

This is Miss Sammie's Blueberries & Cream Smoothie.

And last but not least Miss Becca's Pineapple Passion Smoothie.

Monday, July 9, 2012

Raw Nut “Meat” Vegan Tacos…..So easy and sooooo good!!

This recipe comes from Christy Morgan (a.k.a “The Blissful Chef). She is a vegan macrobiotic chef and cooking instructor; as well as author of the cookbook Blissful Bites.

This recipe was brand new to me and I was so excited about it; that amongst the chaos of unpacking Saturday when we returned home from vacation I made this for dinner. I no more than walked through my front door and began soaking my almonds and walnuts so they would be ready by the time I had tackled unloading our van and unpacking.

As always when using someone else’s recipes I post the original recipe and just note how I changed it; so here it is:

Vegan Raw nut “Meat” Tacos

Topping Ingredients:
Large Lettuce Leaves (I used Organic Romaine Hearts)
Tomatoes (chopped)
Avocado (sliced into thin wedges)
Carrots (shredded to matchstick size and thickness, I bought them already prepared)
Salsa
Vegan Cheese (Optional Add-On) I used Daiya Pepperjack Style Shreds which I love because they are dairy free, soy free, gluten free, eggs free, and peanut and tree nut free.

Nut “Meat” Ingredients
1 cup almonds (soaked for 2 hours)
1 cup walnuts (soaked for 2 hours)
1 tbsp chili powder (I omitted this and all the powdered spices listed and used a packet of organic mild taco seasoning instead)
1 tbsp cumin (see note above)
1 tsp coriander (see note above)
Dash of garlic powder (see note above)
Dash cinnamon (see note above)
Dash cayenne (see note above)
1 tbsp balsamic vinegar
1 tbsp tamari (I used Bragg’s Liquid Aminos instead)

Directions

1. Soak almonds and walnuts together in water for 2 hours. After 2 hours drain and place nuts in food processor; chopping well for 20-30 seconds. You want it a course consistency not a paste.

2. Add in seasonings and mix well. Then serve on lettuce leaves with other toppings.

Additional Notes:
Being that I cook for a mixed crowd in my house I also prepared some seasoned ground (grass-fed) beef for those who would want it. And I did put out organic sour cream and shredded cheese for the non-vegans. And though I thought my oldest daughter (who is a vegetarian) and myself would be the only ones eating the nut “meat;” I was wrong. My whole family tried it and loved it. This recipe was a big hit and definitely will become a regular in this house.


Nut "Meat" all finished

Toppings all prepped

Vegan Taco without Daiya Pepperjack Style Shreds

Vegan Taco with Daiya Pepperjack Style Shreds

My husband's non-vegan; but still healthy taco!

Back from vacation.....time to start blogging!!

Well vacation is officially over and I have lots of stuff I want to share. A few new recipes and a few vegan friendly traveling tips. So stay tuned over the next couple of days as I share those with you and continue on my vegan venture!

For now here’s today’s smoothie recipe. I am using the delicious, organic blueberries my husband and girls picked from our backyard yesterday.

Blueberry Protein Smoothie

8.5oz O.N.E Organic Coconut Water (mango flavored)
½ cup frozen organic pineapple chunks
1 cup fresh picked organic blueberries
3 tbsp Nutiva Hemp Protein Powder
3 tbsp Organic Ground Flaxseed Meal


This recipe made 16 ounces. I drink half for my midmorning snack and half for my afternoon snack.


Our Fresh picked blueberries!


Blueberry Protein Smoothie


Monday, June 25, 2012

Drinking in that good nutrition!

Well this post is days over due….oops busy week last week! Sorry to those I told this would be up sooner.

Today I want to take some time to highlight the liquid part of my daily nutrition including elderberry syrup, tart cherry elixir, and of course smoothies!

I will start with the elderberry syrup. I had read about elderberries and the nutritional benefit of them; but had never eaten them or the syrups made with them. That was until a few months ago when I got mono. Being that there is no treatment for mono besides prednisone to reduce inflammation; I decided to research homeopathic remedies. Again and again I found people giving testimonies of how much elderberry syrup helped with mono an other viruses and fatigue disorders. I went to buy some elderberry syrup and was horrified by the price for just a small bottle in the health food store. So long story short I researched how to make my own. I found an article about dosage and recipe for how to make the syrup here: www.examiner.com/article/natural-recipes-elderberry-honey-syrup. I order my dried berries from Mountain Rose Herbs and most of the time make the syrup with honey from a local beekeeper; but this time made it with store bought organic honey because the local guy is out of stock for the next couple of weeks. I take 3 tbsp of the syrup every morning and I feel it is one of the primary reasons I was able to recover from mono so quickly. Given it’s strong immune-boosting capabilities it is definitely a staple item I will keep in my fridge all the time.

Next up in my daily liquid nutrition is tart cherry juice with chia seeds. I first heard about the benefits of tart cherry juice in an article in reader’s digest given to me by my mother-in-law. That began months of internet research; where I came across lots of great articles and studies. Tart cherries have anti-inflammatory components as well as many other vitamins our bodies need to be self-healing machines. They contain vitamins A and C, potassium, calcium, iron, and more. But it’s the high levels of cyanidin and power dose of antioxidants that pulled me into trying it. Consuming antioxidant rich foods help fight off those inflammatory cells, heart disease, and overall help keep us young and lively. And a lot of the research I came across showed cyanidin to one of the most powerful natural treatments for arthritis and inflammation.

I started by drinking an 8oz glass of tart cherry juice everyday. I was buying Organic Just Tart Cherry™ by R.W. Knudsen Family®. I did this for several months and found it to be incredibly helpful in reducing the pain and inflammation associated with my arthritis. My only complaint was cost. I was buying the juice which comes in 32oz bottles. The cheapest I found is $6 per bottle. And with the amount I was drinking each day; one bottle only lasted 4 days. So I decided to see if I could find a cheaper source. That’s when I found Michelle's Miracle® Original Tart Montmorency Dietary Supplement. With this I still could take in my 8oz a day of juice; only for $14 I got a 16 day supply. A 16 day supply doing it the other way would have cost me $24. I also mix 2 tbsp of chia seeds in with my 8oz glass of juice. I use Nutiva Organic Chia Seeds. Here’s a great article about the benefits of chia seeds: www.chiaseedshealth.org/chia-seeds-health-benefits/.
 
And last but not least….smoothies!! I love them! I have a smoothie everyday at around 10am. I consider this my mid-morning meal. Being that I start my day with a bowl of fruit at 5:30am, and my tart cherry elixir at 7am; by 10am I am ready for a nutritional boost to carry me through till lunch. Thus why I started my mid-morning smoothie routine. I started out with just fruit smoothies and now mix it up depending on what I feel my body needs that day. Today’s Smoothie is a regular for me. It is a basic vegan protein smoothie.

Here is the recipe I came up with when I created this protein packed combo a few months ago:

Basic Vegan Protein Smoothie
3oz coconut milk yogurt
3 tbsp Nutiva Organic Hemp Protein Powder
3 tbsp Organic Golden Flaxseed Meal
¼ cup frozen organic pineapple or mango chunks
½ of an organic banana
8oz Coconut Water (I prefer O.N.E. Organic Coconut Water)

Just layer all these goodies in your blender and drink.

I chose these ingredients for the following reasons:

Coconut Milk Yogurt : Great vegan source of protein, vitamins A and C, and calcium.

Nutiva Organic Hemp Protein Powder: Here is a link that will give you more info on that product: www.store.nutiva.com/hemp-protein/. And for those who are skeptics of hemp her is great article about it and it’s many nutritional benefits. http://www.3fatchicks.com/7-health-benefits-of-hemp/

Organic Golden Flaxseed Meal: www.livestrong.com/article/208313-what-are-the-benefits-of-flax-seed-meal/

Organic pineapple chunks: www.expertscolumn.com/content/benefits-pineapple" title="Health Benefits of Pineapple Fruit"><h1>Health Benefits of Pineapple Fruit</h1></a

Organic banana: great source of potassium!

Coconut Water: www.onedrinks.com/one-coconut-water-benefits/

Well there you have it, my daily liquid nutritional outline. Hope the information and the links I have provided are helpful. Have blessed evening everyone! Off to make my family dinner….tonight's dinner is Basil & Garlic Polenta Toasties with Sautéed Veggies (recipe coming soon)

Elderberry Syrup Ingredients

Elderberry Syrup all made

Tart Cherry Juice with Chia Seeds

Basic Vegan Smoothie

Monday, June 18, 2012

Let the journey begin! Tonight's Venture: Vegan Coconut Dragon Bowl Salad!

Well here it is my first official post to “Vegan Ventures”…….tonight’s venture: Coconut Dragon Bowl Salad! I found this recipe on the Earth’s Balance website. The recipe was submitted to them by Nikki, The Tolerant Vegan. I made a couple modifications of my own which I have noted in the recipe.

Ingredients:

2 cups brown rice, cooked (I used Lundberg Organic Brown Basmati Rice. When cooking the rice I substituted Nutiva Coconut oil instead of using butter)
1 medium zucchini (I used organic zucchini and actually used 2 instead of 1)
1 cup chopped carrots (I used organic baby carrots)
1 cup chopped broccoli (Fresh from our friend’s garden, Thanks Carl & Joy!)
1/2 tsp. sea salt (I substituted this with herbamare by A.Vogel)
1/2 tsp. black pepper (I substituted this with herbamare by A.Vogel)
4 cups romaine lettuce (I used a mix of romaine, frisee, & boston red leaf lettuce all organic and fresh from our CSA Garden at Hillside Springs Farm)
1/2 cup golden raisins (I used Newman’s Organic California Raisins)
1/2 cup sun-dried tomato (I omitted these because my kids doesn’t care for them)
1/4 cup chopped scallions (also fresh from CSA garden)
3 tbsp. of Earth Balance® Organic Coconut Spread (I used Soy-free Earth Balance)
Pan-seared chicken (we buy Boneless Skinless Chicken Breast by Organic Prairie) (Optional add-on for serving non-vegans/vegetarians)

Fresh Organic Feta Crumbles (again optional add-on for non-vegans)

Directions:

1. If using the rice I used it takes 50-60 to prepare so be sure and allow enough time for cooking and cooling it.

2. Preheat your oven to 400 degrees Fahrenheit.

3. Chop the zucchini, carrots, and broccoli into bite-size pieces. Toss mixture in 1 tablespoon of melted Soy-Free Earth Balance. Spread the vegetables on a baking sheet and sprinkle with herb mare; then roast in the oven for 15-20 minutes. When finished set aside to cool.

4. While the vegetables are roasting, heat the remaining two tablespoons of Earth Balance® in a skillet and add the brown rice. Sprinkle with herbamare, and cook over medium heat for 5 minutes, stirring often.

5. Remove the rice from the heat and stir in raisins and scallions. When finished set aside to cool slightly before adding to salad.

6. Layer lettuce mixture in large salad bowl. Then top with (cooled) roasted vegetable mixture. Next spoon rice mixture in center of salad bowl.

7. When I plated the salad I topped it with pan seared chicken strips for the meat eaters in my family; and fresh organic feta cheese for the non-vegans. I set a few different dressing for people if they wanted it; but the majority of my family opted to eat it with out dressing because it had a lot of flavor as is.


Lettuce Mixture


Roasted veggies set asde to cool.


Salad all done and ready to be served.


My vegan plate :)


My husband's plate; salad with the add-on's of pan seared chicken and fresh organic feta cheese :)